Inviting Users to Organizations
Overview
You can invite team members to your Polar Signals organization with specific roles and permissions. The new IAM system allows you to control exactly what access invited users will have once they accept the invitation.
How Invites Work
When you create an invite:
- You specify the role the user will receive upon acceptance
- Optionally, you can scope the role to a specific project
- An invite link or token is generated
- The user accepts the invite using the link
- A role binding is automatically created, granting the user the specified permissions
Invites have an expiration date and can be expired manually if needed.
Creating an Invite
Step 1: Navigate to IAM Settings
- Go to your organization settings
- Navigate to the Identity & Access Management tab
- Select the Invites section
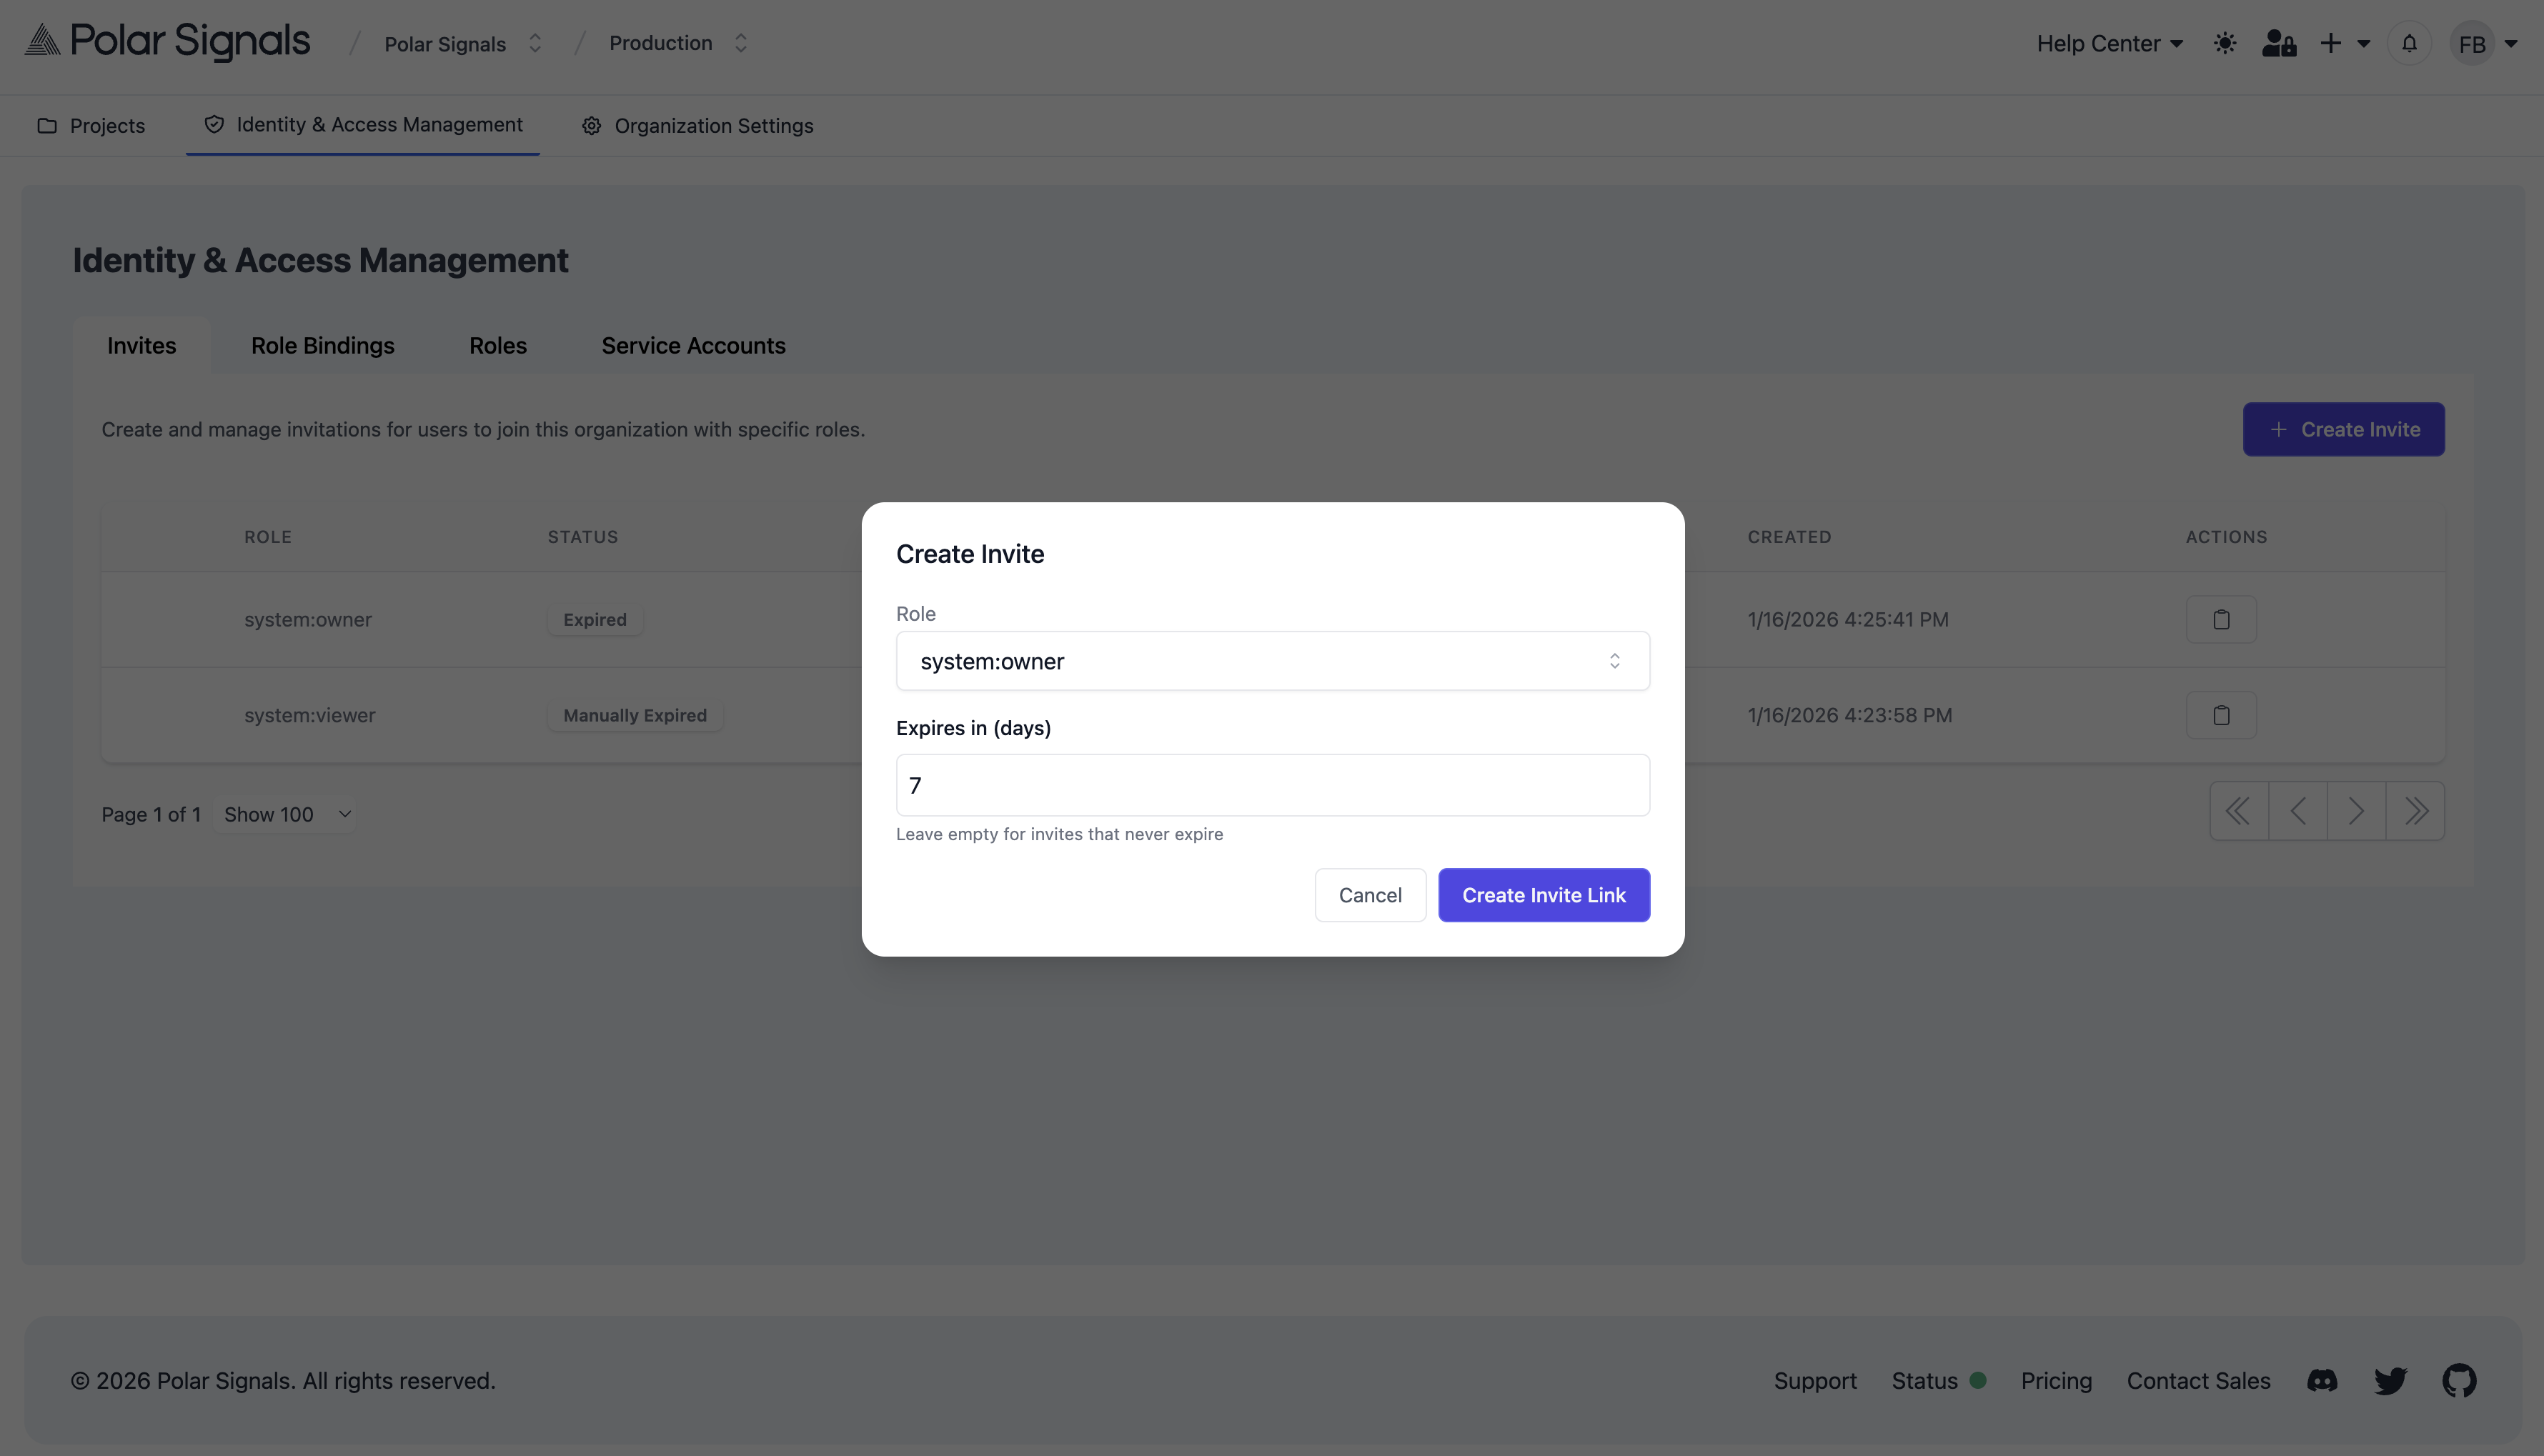
Step 2: Create the Invite
- Click Create Invite
- Select the role to assign to the invited user (e.g., Owner, Viewer, Writer)
- Optionally, scope the invite to a specific project
- Set an expiration date (default is 7 days)
- Click Create Invite Link
Step 3: Share the Invite
Once created, you can:
- Copy the invite link to share with the user
- View the invite token
- Send the link via email or messaging
Invite links should be treated as sensitive. Anyone with the link can accept the invite and gain access to your organization with the specified role.
Managing Invites
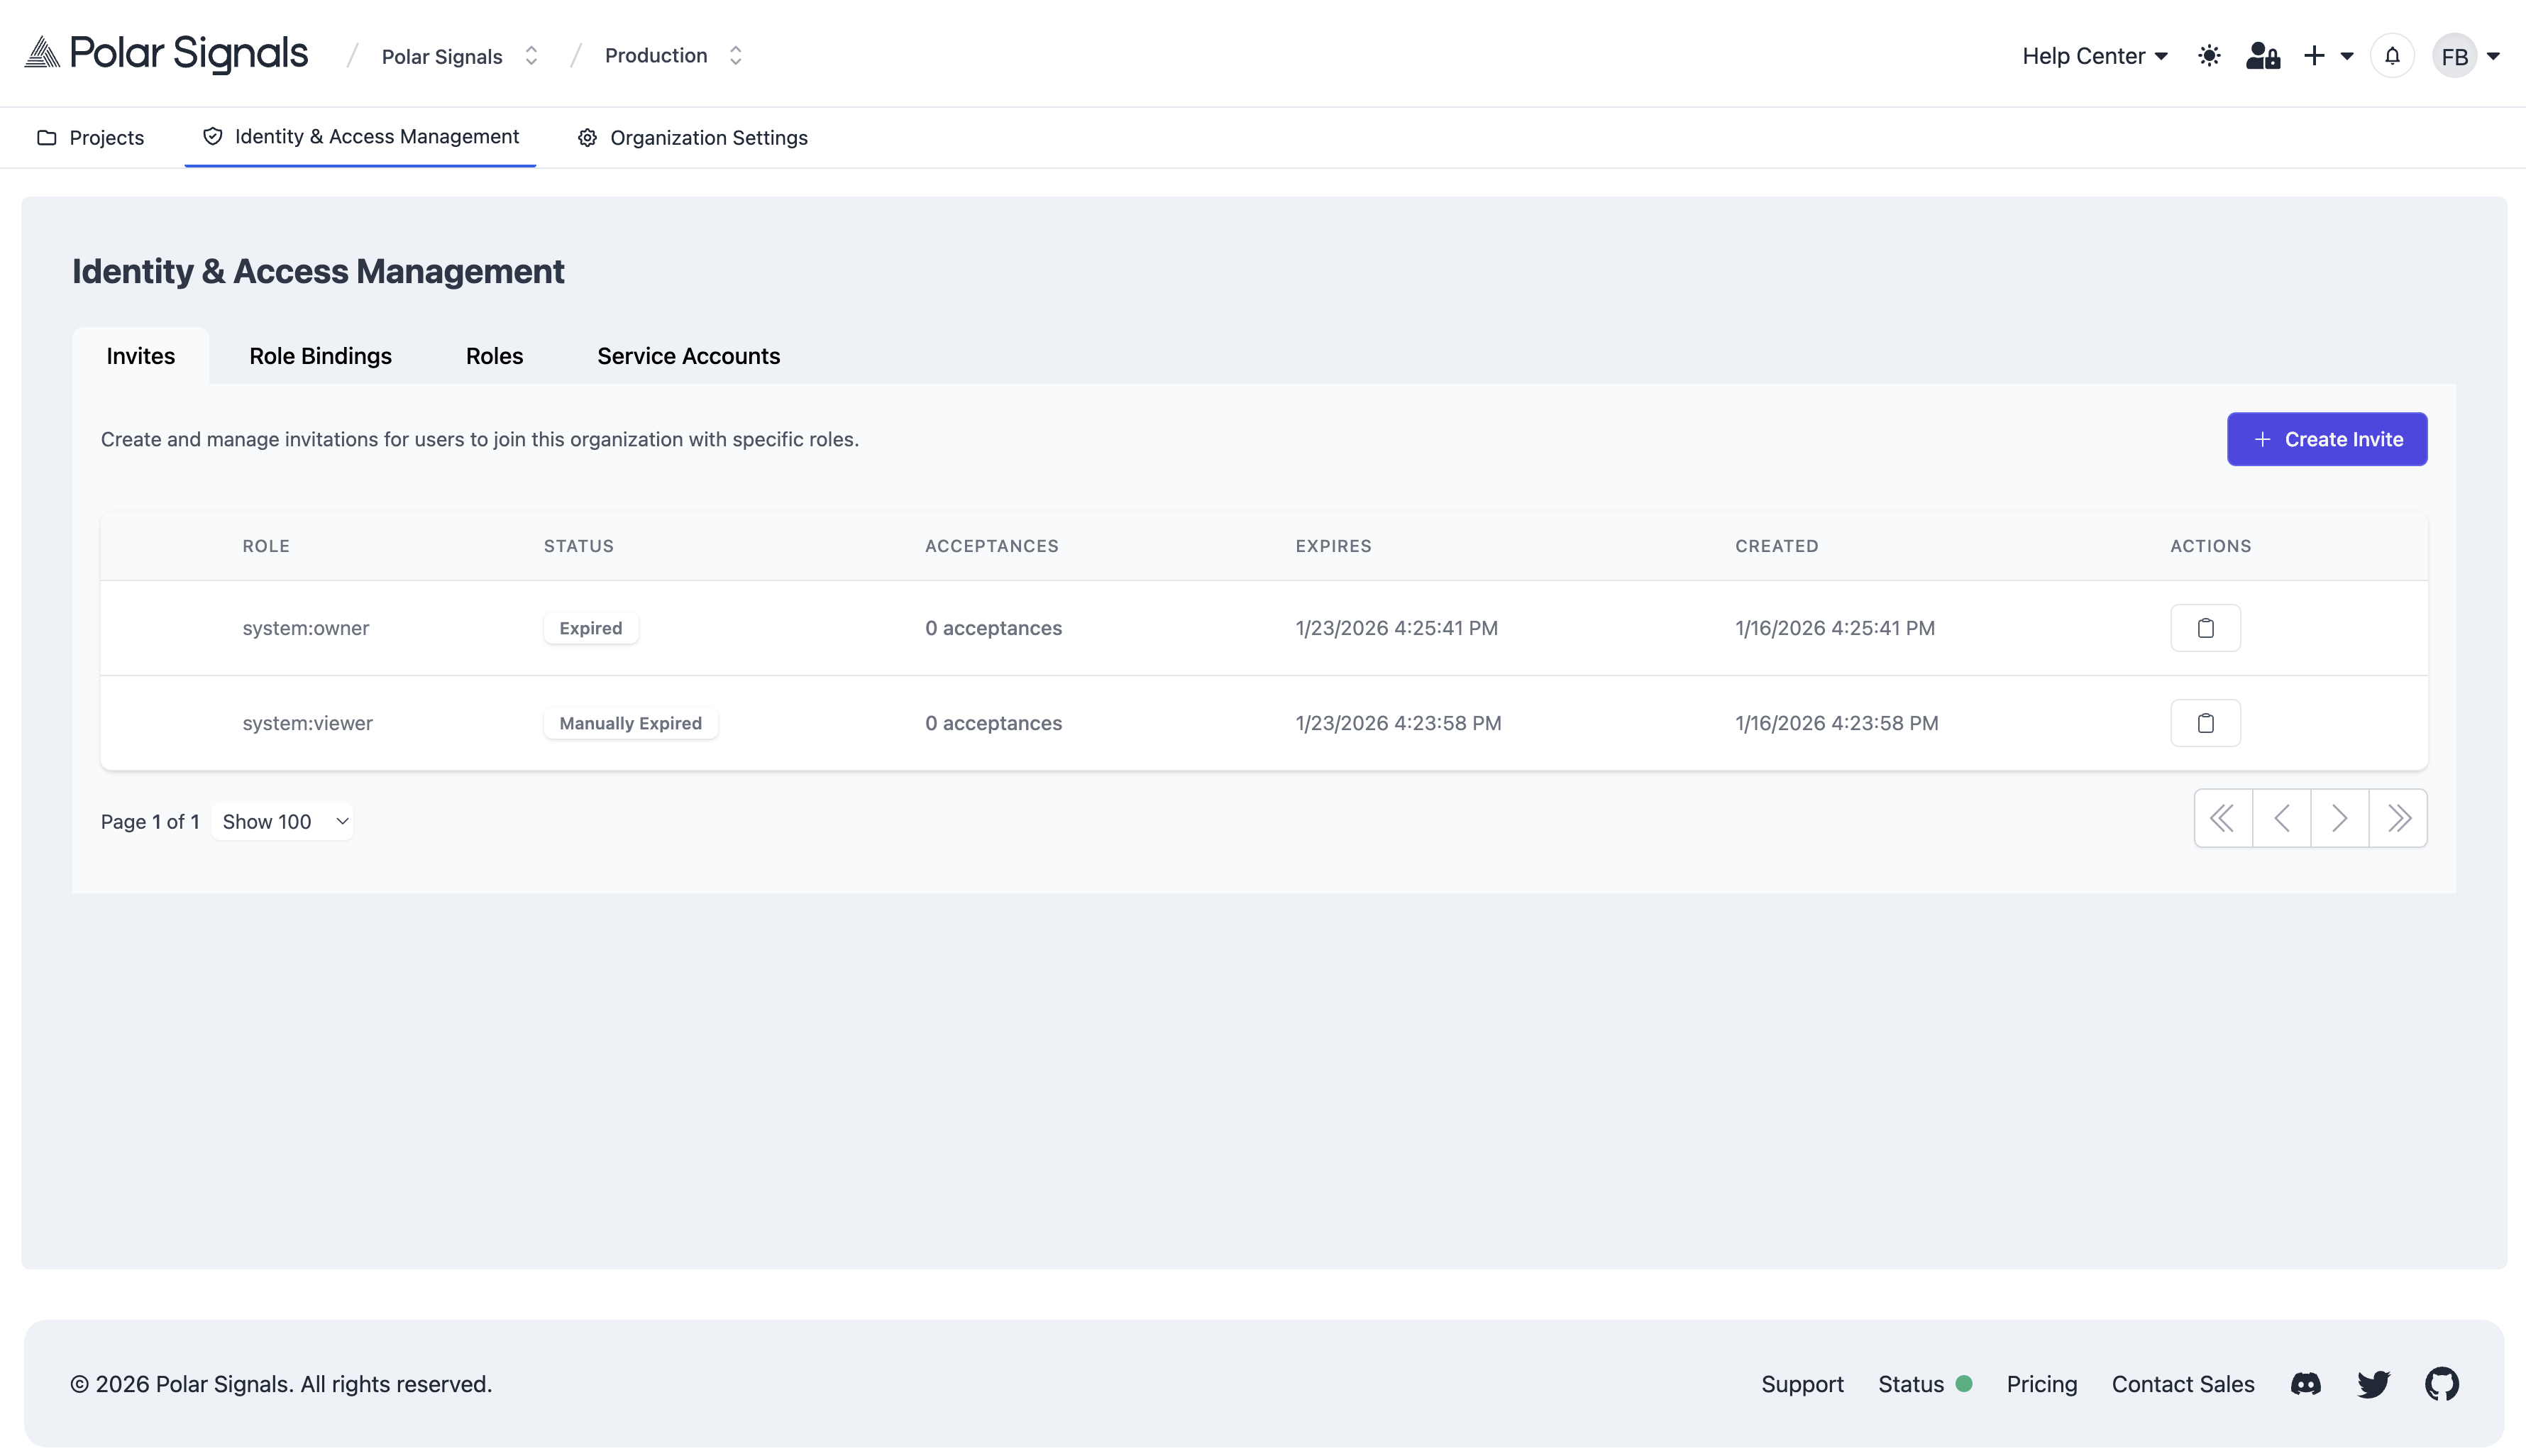
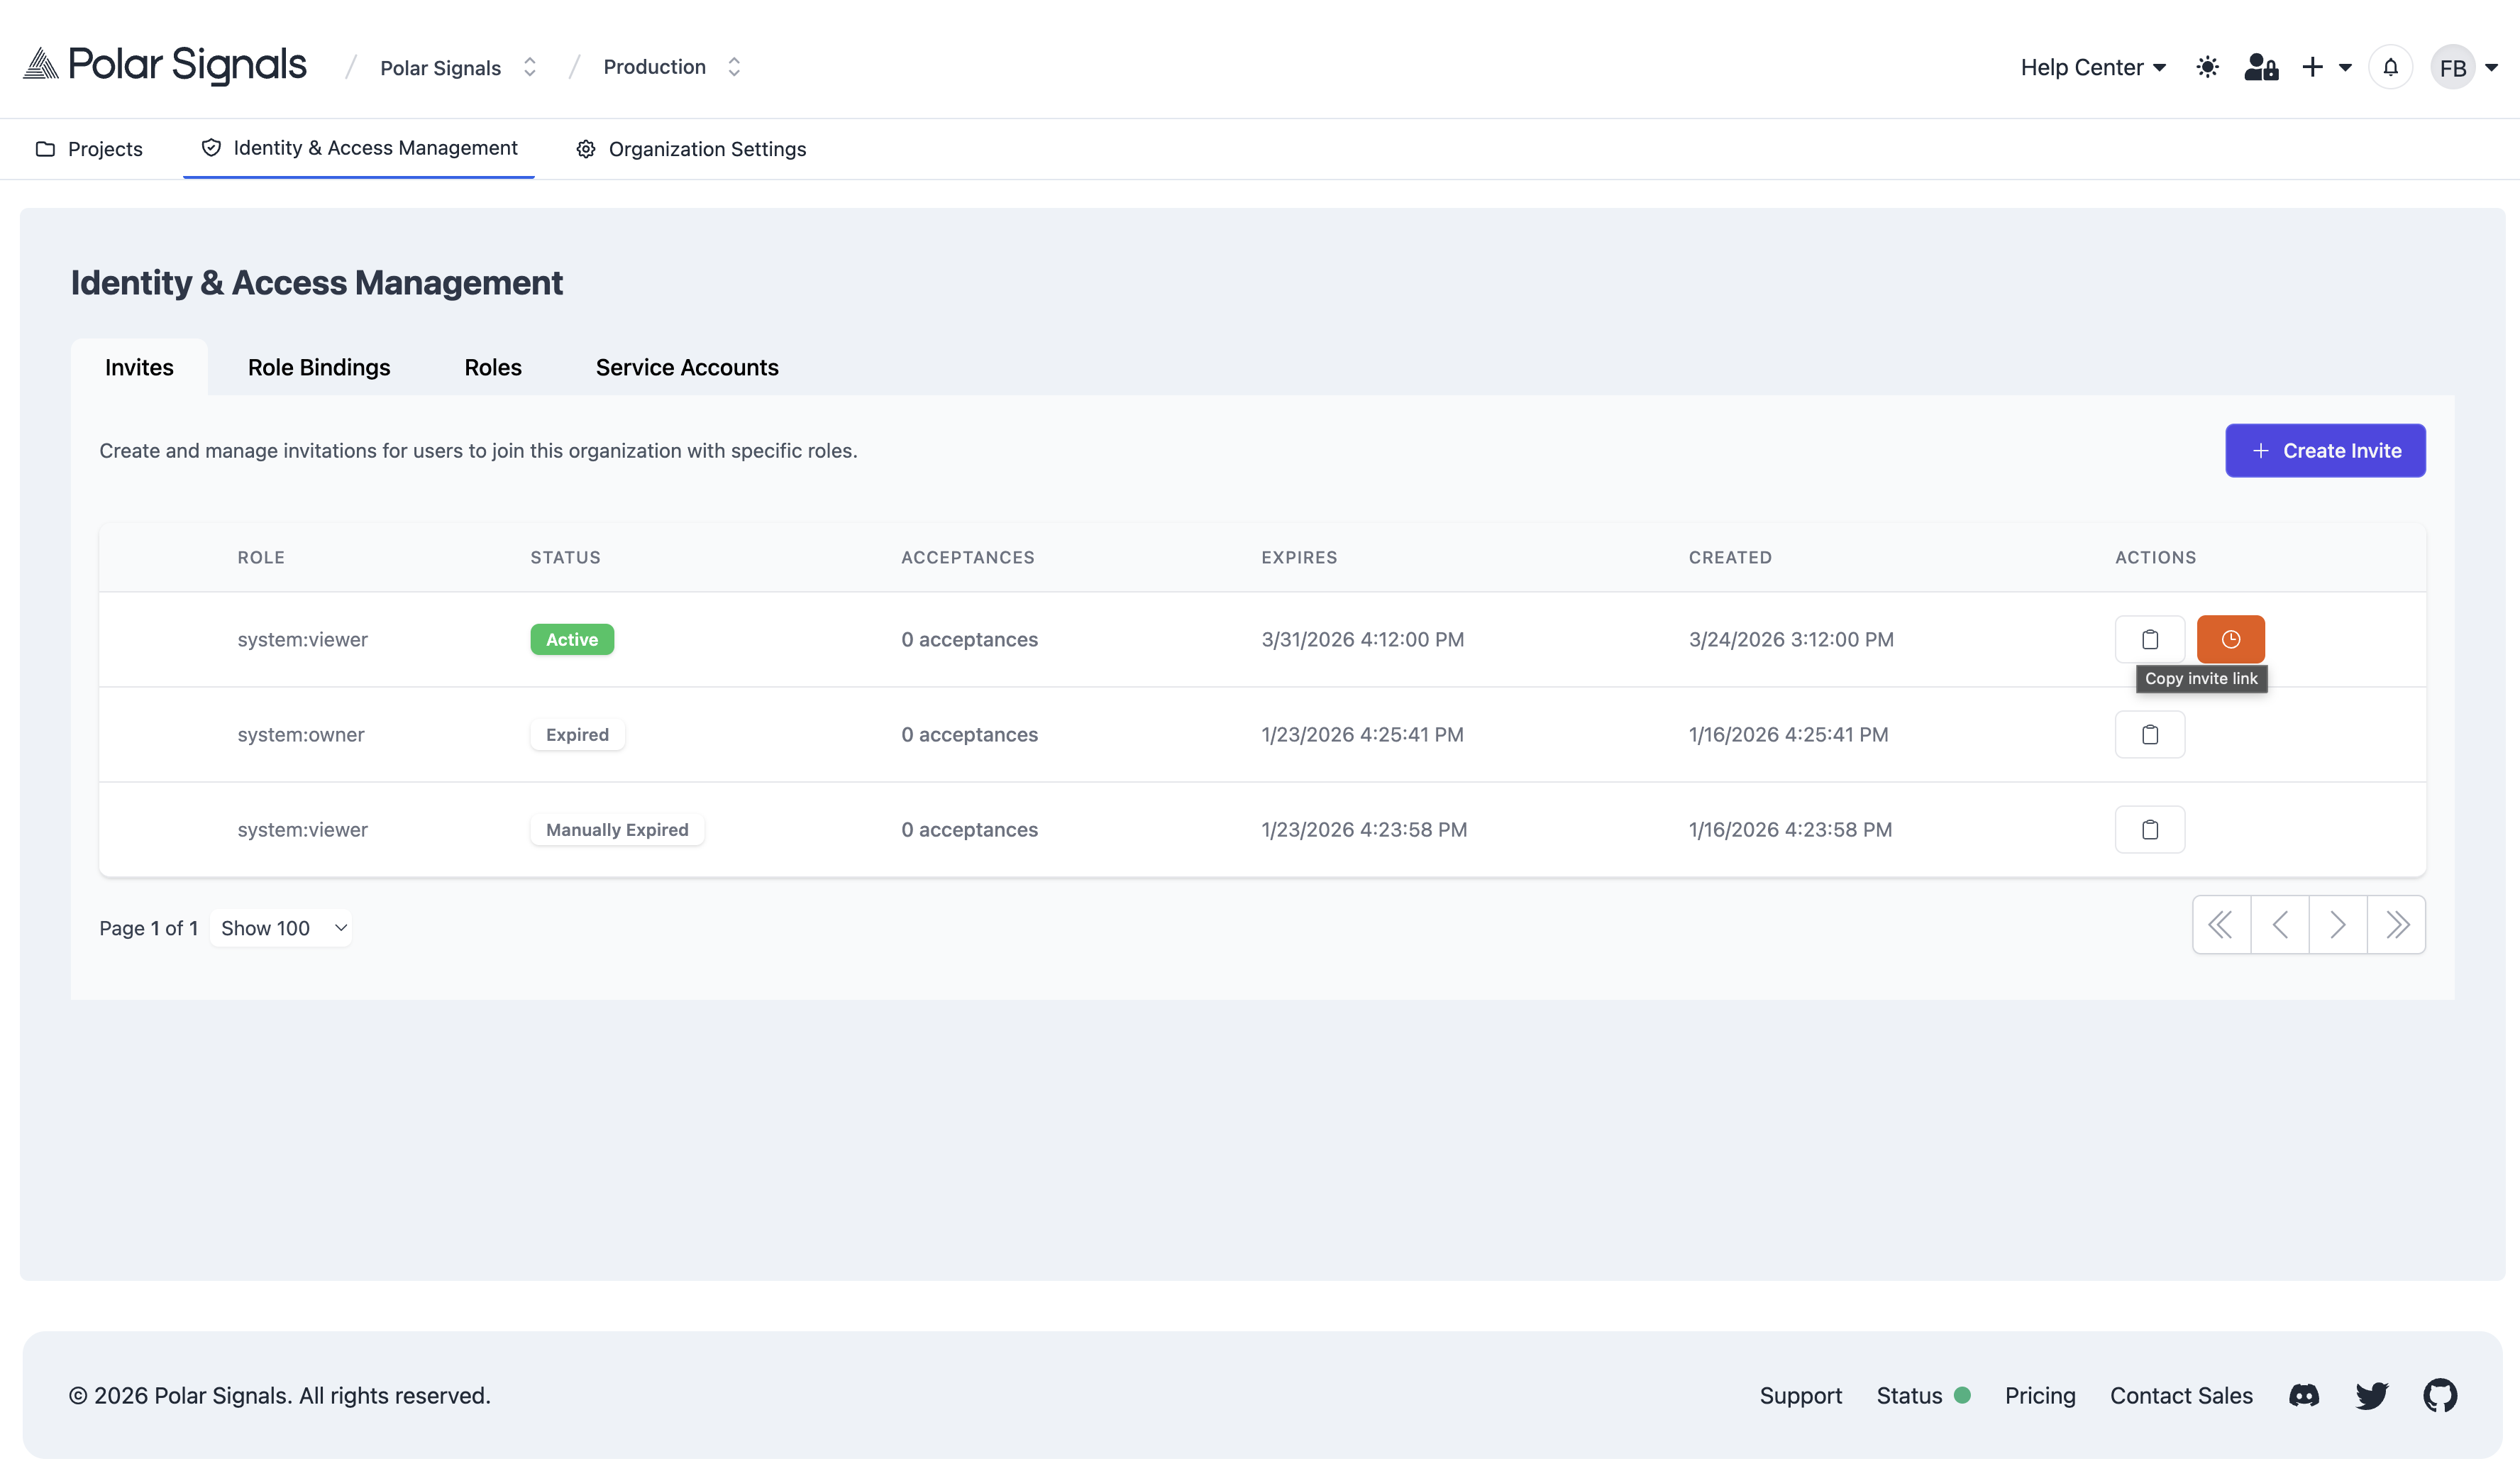
Viewing Active Invites
In the Invites section of the Identity & Access Management tab, you can see:
- All active invites
- The role each invite will grant
- When each invite was created
- When each invite expires
- Who created the invite
Expiring an Invite
To manually expire an invite before its expiration date:
- Find the invite in the invites list
- Click Expire or Delete
- Confirm the action
Once expired, the invite link will no longer work.
Tracking Invite Acceptances
The system tracks when invites are accepted and by whom. You can view this information in the invite details or in the audit logs.
User Experience
Accepting an Invite
When a user receives an invite link:
- They click the link, which takes them to the Polar Signals Cloud
- If not logged in, they'll be prompted to sign in or create an account
- Once authenticated, they can review the invitation details (organization name, role)
- They click Accept Invite
- A role binding is created, granting them access
- They're redirected to the organization
After Acceptance
After accepting an invite:
- The user will have immediate access to the organization with the assigned role
- Organization owners can view the user's role bindings in the Role Bindings section
- The user's access can be modified or revoked by managing their role bindings
Managing User Access
After a team member has joined your organization, you can manage their access from the Role Bindings section in the Identity & Access Management tab:
- View all roles: See all role bindings for the user
- Add more roles: Create additional role bindings for different projects or with different permissions
- Change roles: Delete old role bindings and create new ones with different roles
- Remove access: Delete all role bindings for the user
For detailed information about roles and permissions, see the User Roles documentation.
Best Practices
Role Selection
- Owner: Only invite trusted team members as Owners, as they have full control over the organization
- Viewer: Good default for team members who need to view profiling data but not make changes
- Writer: Typically not used for human users; better suited for service accounts
- Custom Roles: Create custom roles for specific use cases (e.g., a "Developer" role with project creation but not billing access)
Project Scoping
- Use project-scoped invites when you want to grant access to only a specific project
- Organization-wide invites are better for team members who need access to multiple projects
Security
- Set appropriate expiration dates on invites (shorter for sensitive roles)
- Expire invites that are no longer needed
- Regularly review active invites and role bindings
- Use role-specific invites rather than always inviting as Owner